Wednesday, August 25, 2010

W126: Car Washed & Waxed

Collected my W126 from workshop. I decided to give the car a shower, vacuum the interior & wax on the body all by myself! The W126 looked complete cleaned & shined after that!

Picture 1: The Front Corner Angle Look After Shower & Wax Sessions

Picture 2: The Rear Corner Angle Look after shower & wax sessions

Picture 3: The Triangle Safety Kit From the Trunk

Picture 4: The Interior Front Dashboard - lubricated the dashboard with dashboard moisturiser

Picture 5: The Interior Leather Seats - moisturised with MeGuiars Leather Conditioner

Monday, August 23, 2010

W126: Top Overhaul.. That Solved The White Fume Issue!

Sent in my W126 to the workshop located nearby my office. I was quoted for the price of RM600 for being the labor cost of top overhauling my W126 engine. Check out the pictures after the jump!

Picture 1: The W126 parked on the ram ready to lift up for
removing the existing engine oil

Picture 2: Here we go... the job commenced. Removed the Air Filter Box, etc.

Picture 3: Air filter system, radiator fan removed

Picture 4: Cylinder Head Removed

Picture 5: Valve Cam Cover, Camshaft/Timing Chain To Remove

Picture 6: Cylinder Head Cover Pending to clean

Picture 7: The Valve & Camshaft about to out from the W126
(Whoops... did you see the hammer placing inside the cam cover?)

Picture 8: Valve Cover & the Springs are full of carbon; valve seals
are harden like rock; this is the mainly reason why the engine generated
white fumes.

Picture 9: Look at the Valve Guides' surface. Full of thick carbon

Picture 10: Take a closer look at the Valve Guides. OMG, so dirty!

Picture 11: The engine block; with very dirty piston heads

Picture 12: More picture on the dirty engine block. The uneven
surface of piston heads are normal. I was shock to see it initially.

Picture 13: The engine block was cleaned/polished on the surface.

Picture 14: Take a closer look ath the cleaned piston head.

Picture 15: Valve guides were cleaned/ removed all the dirty carbon

Picture 16: New valve seals replaced

Finally, the top overhaul job was done. The W126 generated no more white fumes from the exhaust. Not only that, i could feel that the W126's engine is smoother, quieter, and more powerful than before. I don't feel the car sluggish whenever i accelerate the pedal. Just amazing! 

Thursday, August 19, 2010

W111: Engine Restoration / Overhauled (Update 2)

Guess what? My M114 engine has been completed overhauling. It is now ready to fit back into my W111. Having said that, i was called to come to take a look on the engine after a long restoration on the engine. When i reached to the workshop, my eyes were blind fold s if like the overhaulin' show (shown in Discovery Turbo channel).

I really can't believe that was my M114 engine, properly restored not only internally, but also the exterior look as well! It just look awesome new! Oh boy.... that really motivated me so much... All my efforts, time & monies putting onto this W111 restoration project worth every single penny!

Picture 1: M114.980 Engine

Picture 2: Another photo of my M114.980 engine

Picture 3: More photos from my M114.980 engine... LOL

Picture 4: Last photo from my M114.980 engine
before wrapping up the engine to keep in the garage

Please feel free to check out the write up and photos of my M114 engine when it was first arrived from UK.

Sunday, August 15, 2010

W126: The White Fume

It is indeed horrible to see my W126 generated some white fumes from the exhaust. Having said that, it really made me feel embarassing when other vehicles follow from behind. Not only that, when i sent my W126 to tireshop to check the tire pressure, i supposed to feel proud of having such wonderful look of W126 in the eyes of those people around, but not anymore when they see white fumes come out from the exhaust even though the W126 was idle with engine starts.

This problem has been occured since day 1. I thought it would be due to the residue/ too much of carbons stuck inside the engine due to the W126 has not been driving in long period. Finally, i decided to grab the top overhaul kits from Mercedes sparepart shop, and sent the car to the workshop for top overhauling. Keep the finger crossed everything will be fine after the top overhauling.

Saturday, August 7, 2010

W111: Engine Restoration/Overhauled (Update 1)

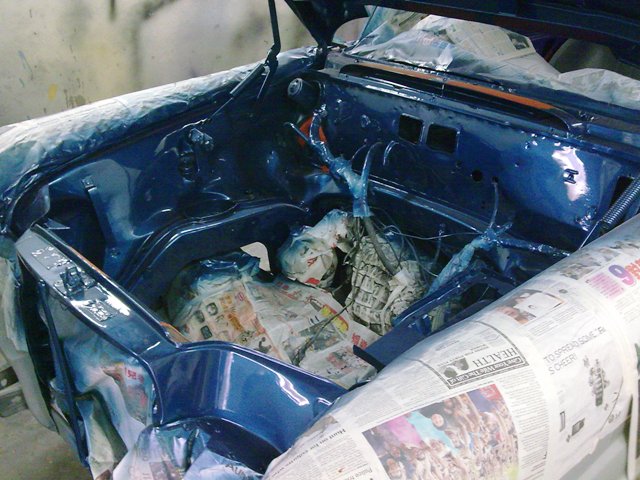
After visiting my W111 from the paint workshop, i decided to take a quick checking on the my engine that has been sent for overhauling since 3 months. Engine was progressively fitting in parts by parts after collecting them from wet blast center. The following are the new parts purchased:

a) Clutch kit set (Made in Germany)
b) Water pump (Made in Italy)
c) Gasket kits (complete for overhauling use)
d) Spark Plugs (Denso Iridium)
e) M114 wiring set (imported from Canada)
f) Rubber seals for both front & rear windscreen (OEM spec from US)
g) Rubber seals for 4 doors (original part from Germany)
h) Timing Chains (original M114 from Germany)

Meanwhile, i also managed to get some used parts below for my W111:

a) Radiator (recored - shipped from UK)
b) Air box (shipped from Germany)
c) Gearbox (stand by in case the existing gearbox failed)
d) Power steering motor (imported from UK)
e) Stabilizer bar (front - from Germany)
f) Rear Axle (complete used from Germany)
g) Steering (original black from Germany)
h) Door panels (4 pcs from Germany)
i) Door hinge (complete 4 pcs from Germany)

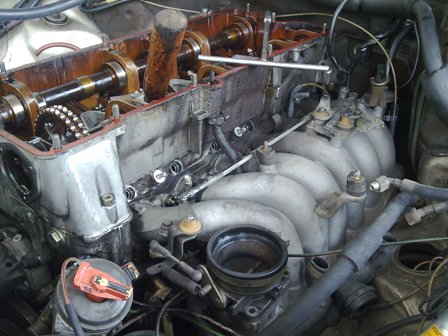
Please check out some photos below:

Picture 1: M114 engine restoration. They are not repainted but
to wet blast till original look

Picture 2: New gaskets applied on the engine. Removed all carbons

Picture 3: All the bolts were replaced new.

W111: Paint Restoration (Update 1)

I went to check on my W111 this afternoon after my work. Guess what? The engine bay and the interior of my W111 were painted. En. Naza informed me that the paint job has been started, and invited me to drop by to have a look few days ago.

The following are the pictures to share with you all. Stay tuned for more update. :)

Picture 1: Engine bay of my W111

Picture 2: The interior seat panel board

Picture 3: The wheel cover polished and preparing to paint
again due to poor quality paintwork on it

Picture 4: Floor board painted. Surface was rough due to anti-rust
layer applied prior base coating & clear coat.